File and folder management

There is overflow menu against all files and folders. Click on the overflow menu against any file to display the following menu

  •   Shared denotes that the file is shared with someone or shared by someone.
  •   Comments direct to the comments added for the file
  •   Add to favourites for easily accessing
  •   Details will show the details tab of file
  •   Rename- provision to rename the file
  •   Move or copy- to move or copy file to any destination
  •   Download- option to download the file
  •   Delete file- to delete the file (it moves to trash)

The Details view shows Activities, Sharing, and Versions information for Folders and if a file is selected, it will list Activity, chats, comments, sharing and versions.

Activity

Provides an activity feed showing a log of your file.

Chats

  • In case of a new file, option will appear as Share this file.
  • For a shared file, after pressing on chat, it will show as join conversation.
  • After pressing on join conversation, the conversation will open and a Talk room will be created with the same folder name.

1. Share by name

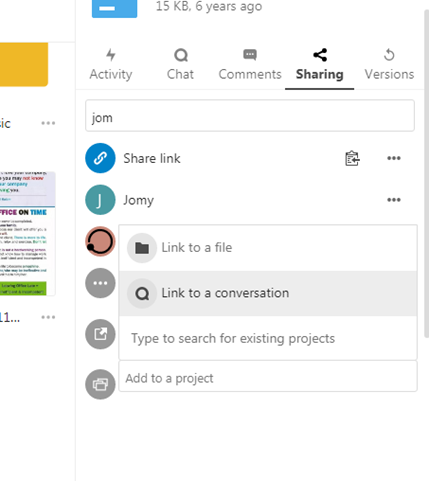
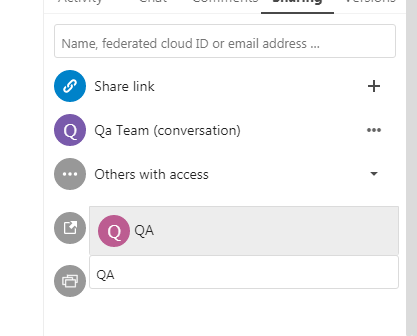
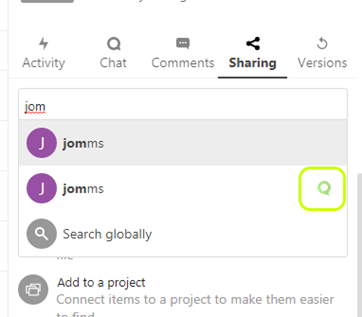
         Enter the name of the user to which you want to share file.

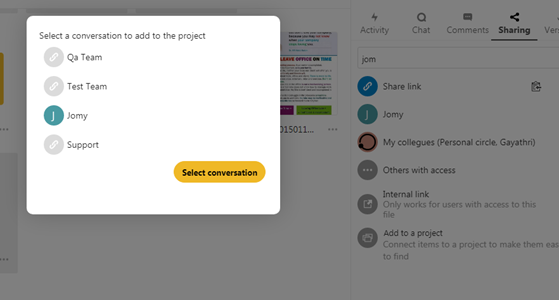
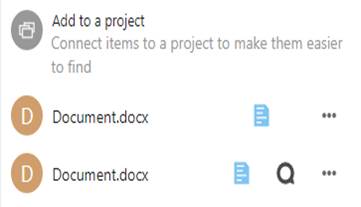
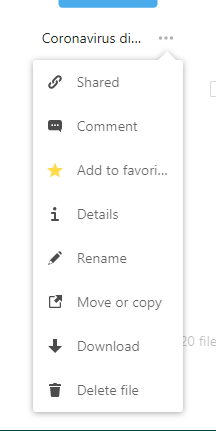
User can either share it to folder or can share it in talk room.

Click on users name with chat icon, file will be sent to the corresponding chat room. This option only appears for users who have at least one chat conversation open with you.

After sharing an overflow menu will be visible there.

Comments

Use the Details view to add and read comments on any file or folder. Comments are visible to everyone who has access to the file.

Sharing

  • Users can share files with their name, email address, groups and to Circles.
  • They can create public shares for people who are not include in our organization.
  • You have control over the number of user permissions on file shares:
  • Require a password on public shares
  • Require an expiration date on public share links
  • Allow re-sharing
  • Restrict sharing to group members only

2. Share by email address

Enter the email address of the user that you want to share the file with.

3. Share via link by "user":

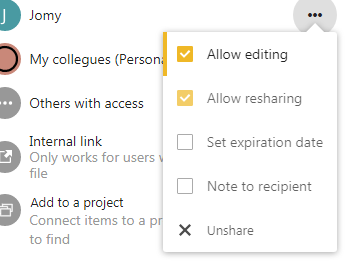
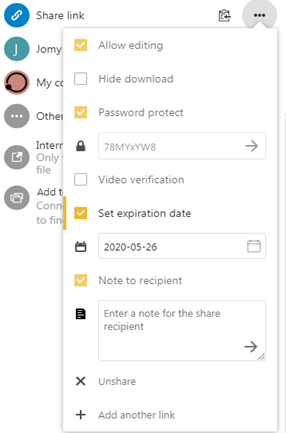
To enable public shares for people who are not Dooth users via hyperlink.

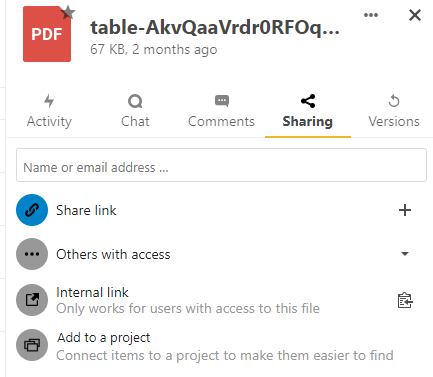
         Create a new share link by clicking on the plus button against Share link

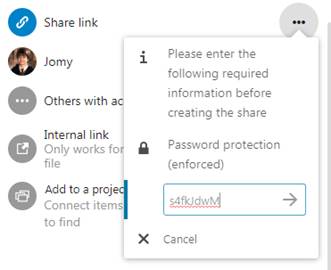
         Enter the password, copy the link and send.

        Password protection: To force users to set a password on all public share links. This does not apply to local user and group shares.

  • Add user permission by enabling the settings.
  • Click on the menu icon against the share link
  •  Allow editingReceiver can edit the shared file
  • Allow resharing: Receiver can re-share the shared file, if option is selected. Once resharing is disabled by the sender after sending the file, the receiver will see “Resharing is allowed”
  • Set expiration date: you can set an expiration date on public shares, and local shares do not expire when public shares expire. The only way to expire a local share is to click the trash can icon to un-share your files.
  • Video verification: Once this is enabled, the receiver needs to complete video verification after receiving the password, a video call with user who has shared the file will be initiated and user who shared will state the password via video call.
  • Note to recipient
  • Unshared: After selecting unshare by the sender, the file will display the message File not found for the receiver.

4. Internal link :

  •          Only works for users with access to this this file.
  •          If the link is received by a user without access, File not found will be displayed
  •          The sender gives access permission and the receiver can view the file.

5. Add to project:

Users can associate files and chats with each other in projects. It will be visible in Files and Talk as a list, allowing users to immediately jump to them. Clicking on any of the items in a project leads right to it, whether it is a chat or a file.

  •          After clicking on the link to the file, select a file to link
  •          If a conversation is selected, the list of conversations will pop up.

Click Add to a project and select the type of item you want to link with the current file/folder. A selector will open that allows you to select a Talk conversation.

Once the item has been selected, a new project is created and listed in the sharing tab of the sidebar. The same project will also appear in the sharing sidebar of the linked items.

The list entry shows quick links to a limited number of items. By opening the context menu, the project can be renamed and the full list of items can be expanded.

Adding more entries to a project

If another item needs to be added, to an already existing project this can be done by searching for the project name in the Add to a project picker.

Visibility of projects

Projects do not influence the access and visibility of different items. Users will only see projects belonging to other users if they have access to all contained items. Only the user who has created the project can access that project to add files or chat rooms to that.

How to remove a file or talk room from a project?

You can remove a talk room or file from a project by clicking the close button against the item.

How to remove an entire project?

The project can be removed by removing all files or talks added to a project. Items can be removed from a project by clicking the close button against each item in the list.

Version:

 Showing the versions of the files.

Version will change once the same file is uploaded again with same name

Related Articles
Create and edit file in Dooth Vault

Create and edit file in Dooth Vault In Dooth Vault, users can create and edit documents, spreadsheets and presentation files Read more

Group folders and shared folders

Group folders and shared folders In Dooth Vault, an admin or head of your department / team has the provision Read more

Settings

Settings Hidden Files:          The hidden files can be created by putting a . before the file name, say .example WebDav Read more

Managing deleted files

Managing deleted files When you delete a file, it is not deleted permanently immediately. Instead, it is moved into the trash bin. It is not permanently deleted until you manually delete it, or when the Deleted Files Read more